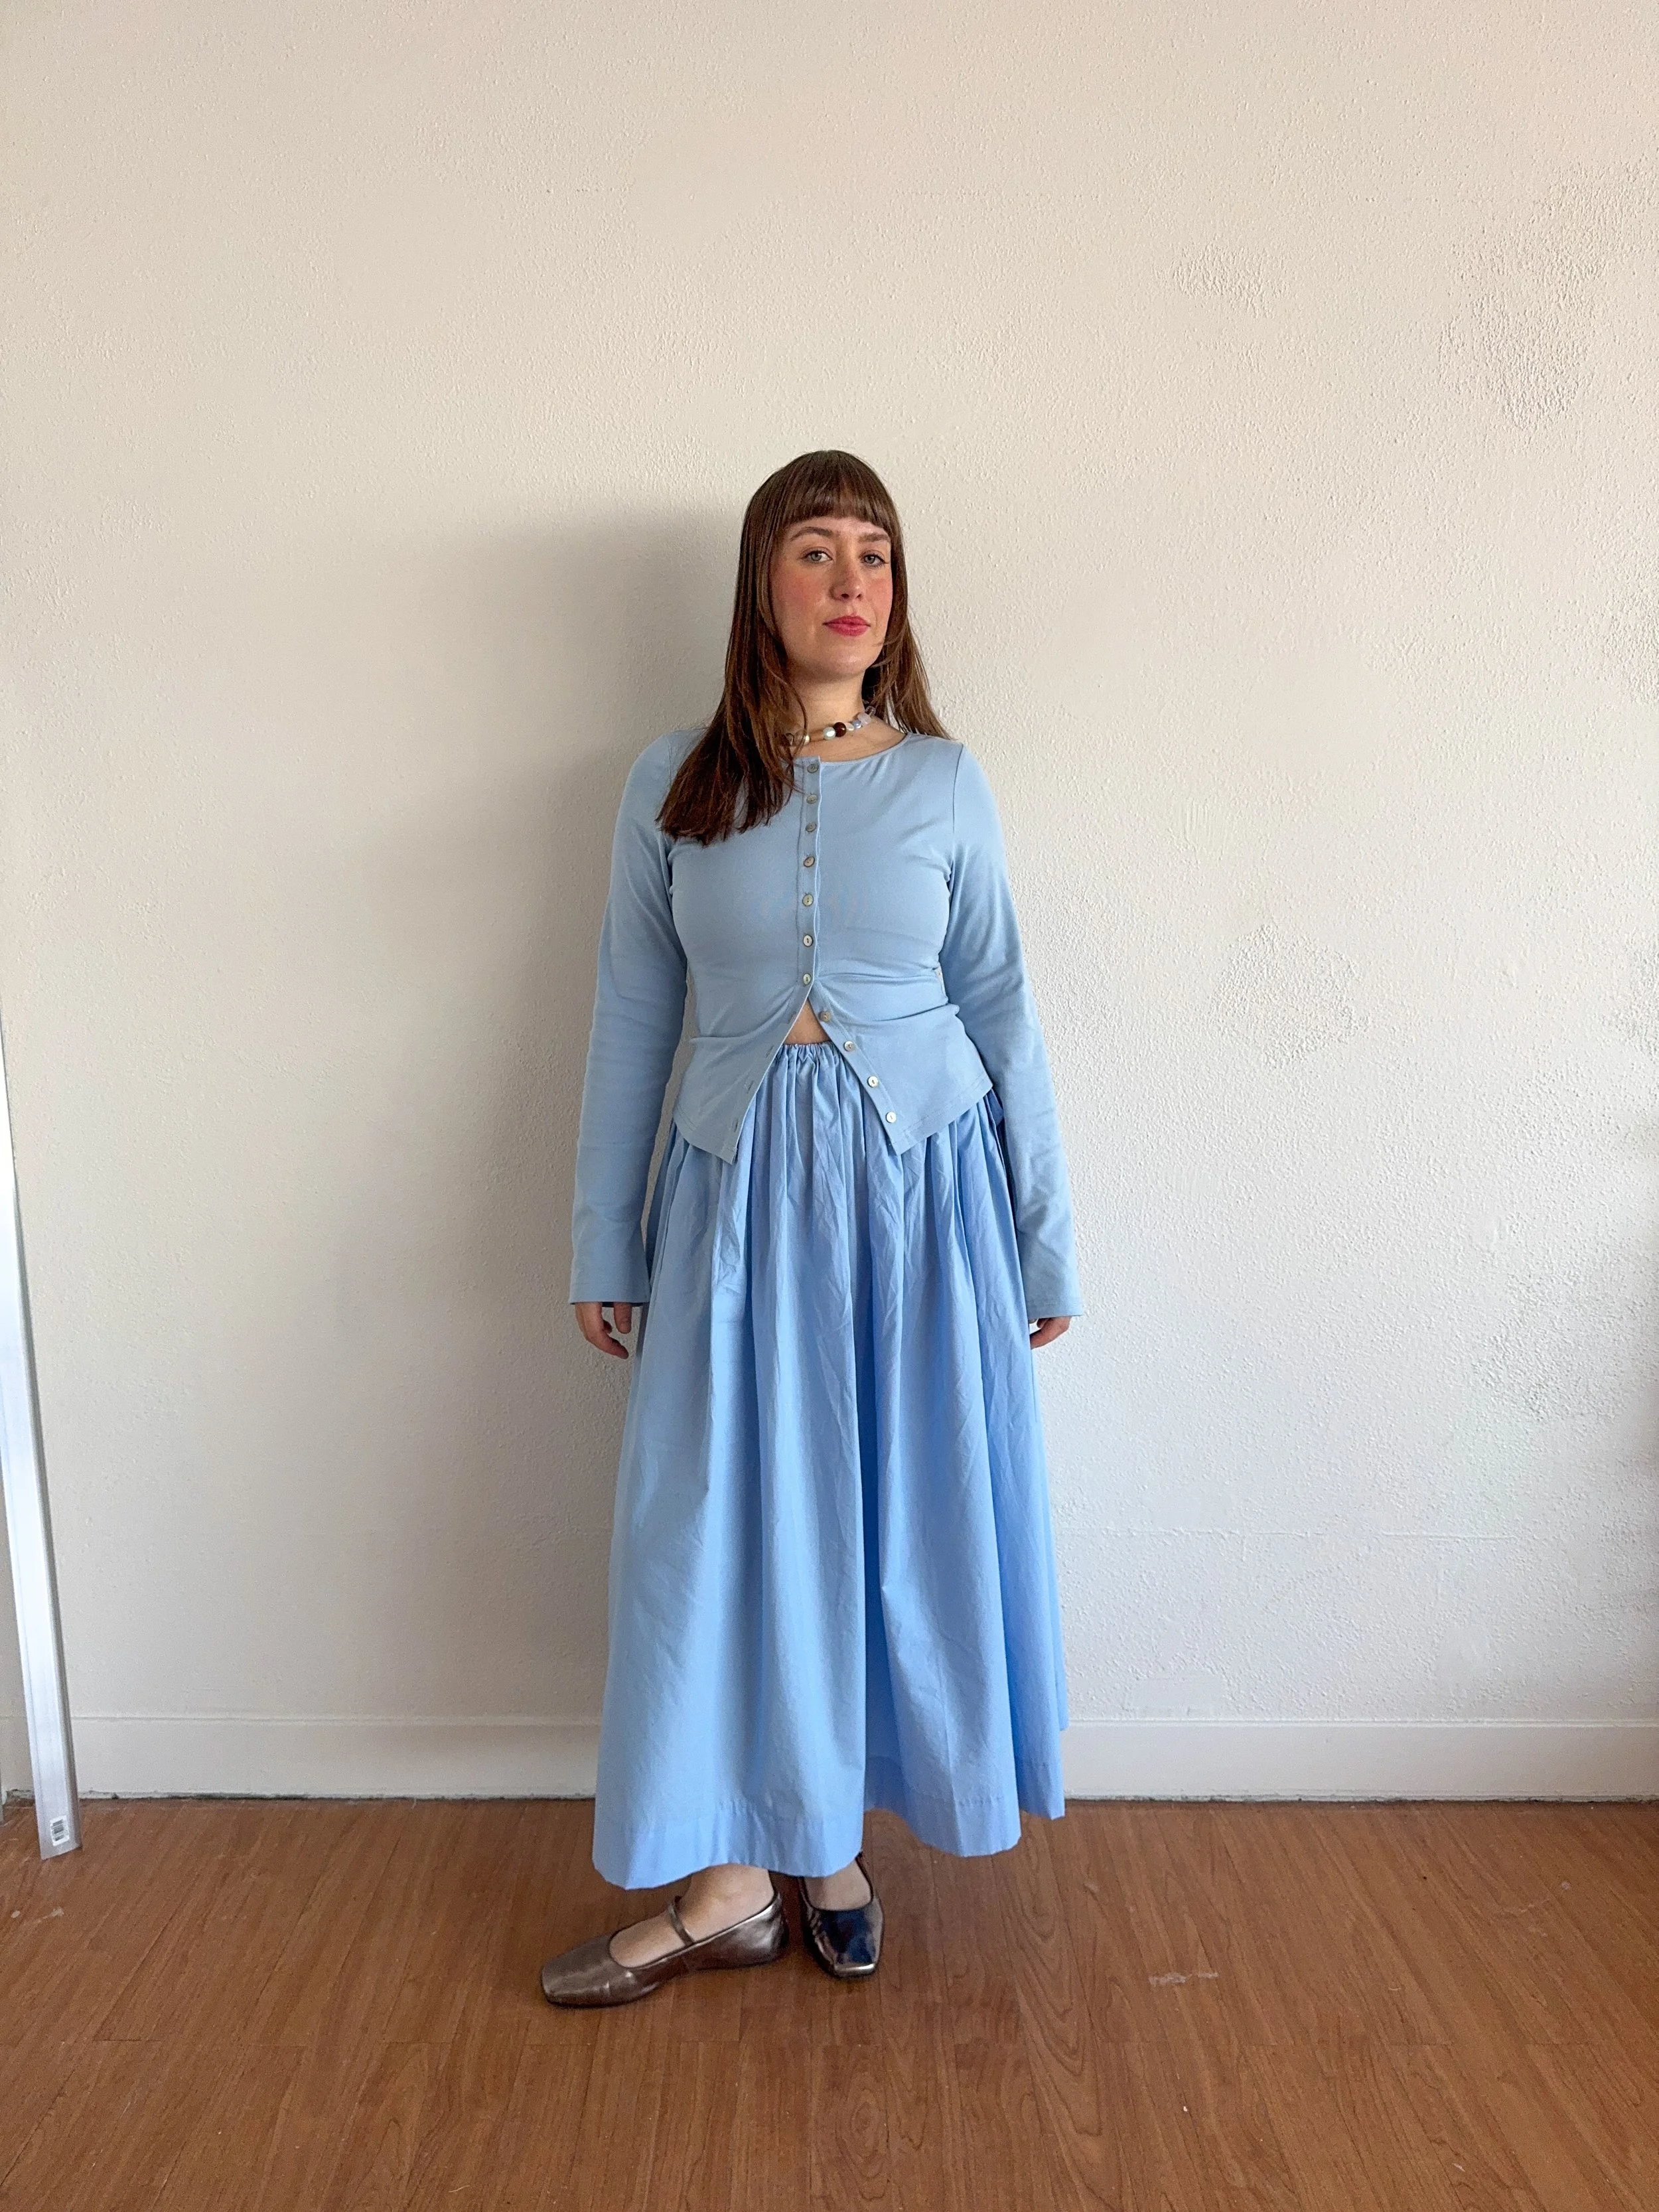
DIY Drawstring Skirt
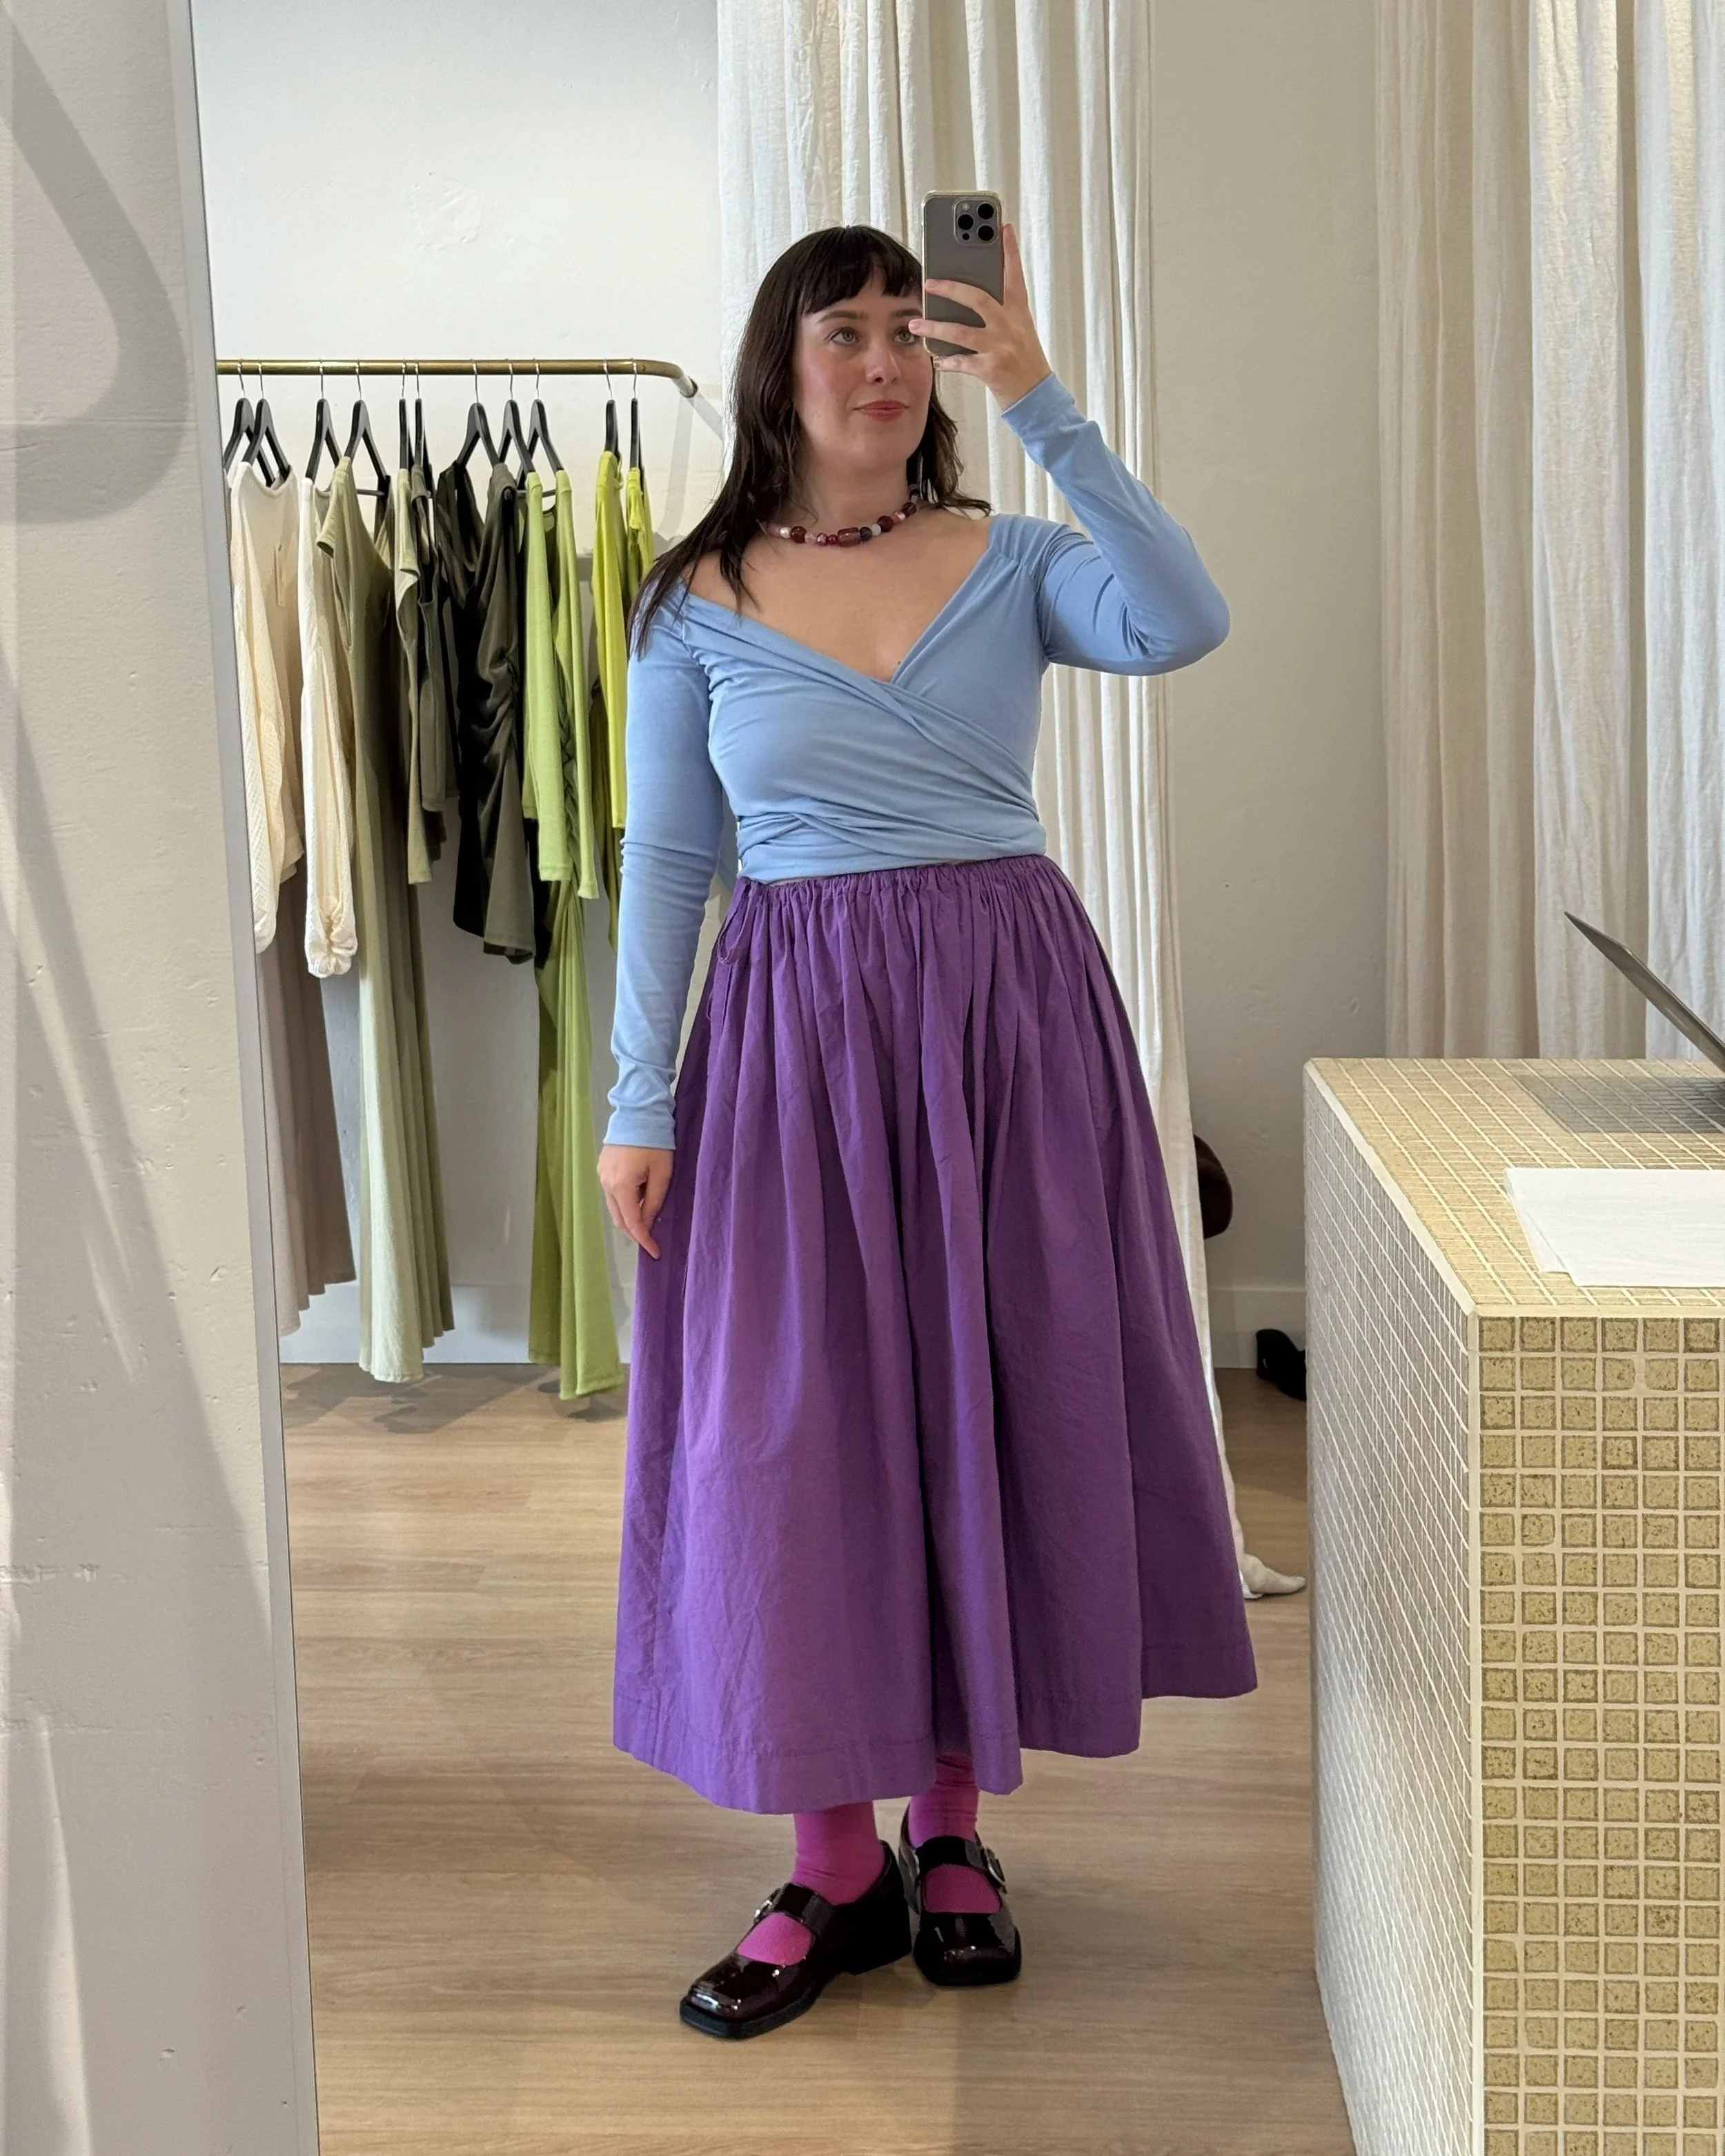
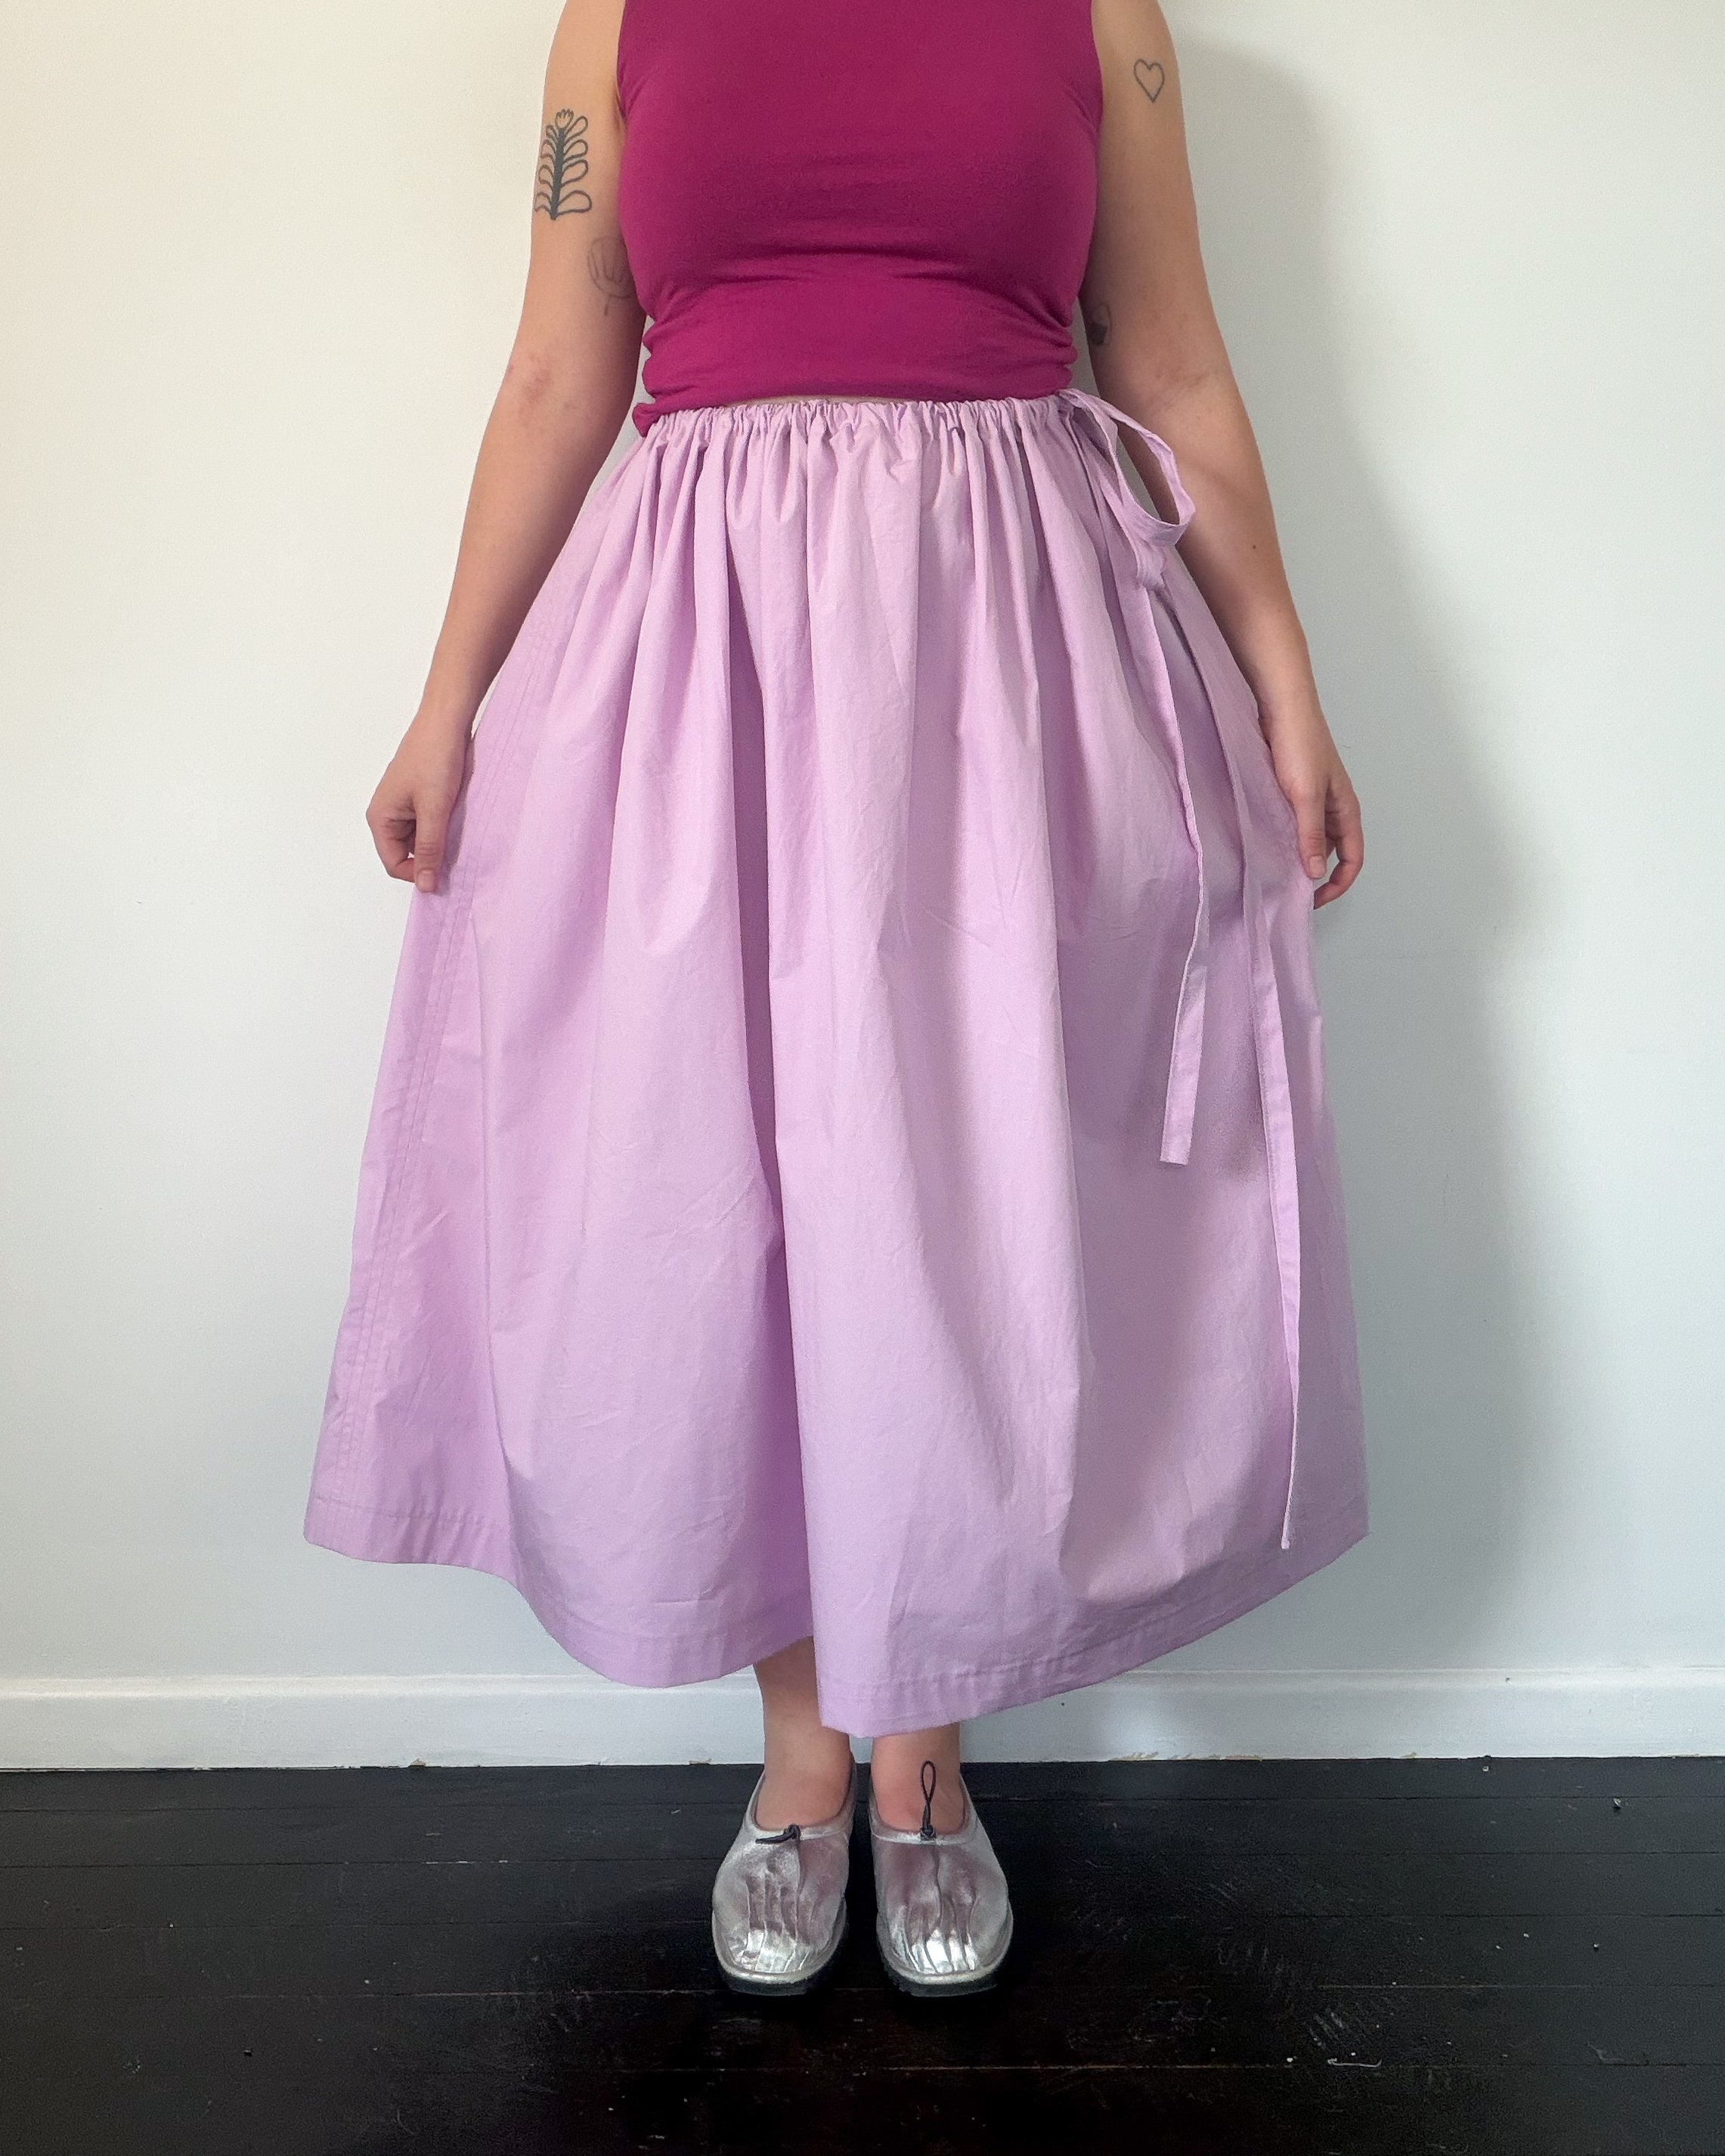
Lately, I’ve been obsessed with making these easy drawstring skirts. They’re simple to sew, super adjustable and go with everything in my wardrobe. I’ve made a few now in different fabrics and lengths, and every time I wear one, someone asks how I made it. And every time, I tell them it’s just two rectangles and a drawstring!

This easy drawstring skirt tutorial is based on a simple self-drafted method I’ve developed through my own sewing practice. Drawstring skirts are a timeless, beginner-friendly style that have been reimagined in so many ways over the years. This version is just my take, made to be adaptable and easy to sew.
Like all of my pattern-free sewing projects (in Sew It Yourself and here on my blog), this one has infinite variations. You can make it shorter, add a ruffle, use contrast topstitching, add pockets, go for a deep hem or a tiny one, or switch between a thick or thin drawstring. It’s completely up to you.
This project is perfect for beginners because it’s made with all straight stitches and simple construction, and I can usually sew one up in about two hours. Here’s how to make it:
You’ll Need
2+ metres of fabric (depending on your height and desired length - see Fabric Requirements for how to calculate)
Matching thread
Safety pin for threading your drawstring
Scissors
Measuring tape
Iron and ironing board
Pattern Formula
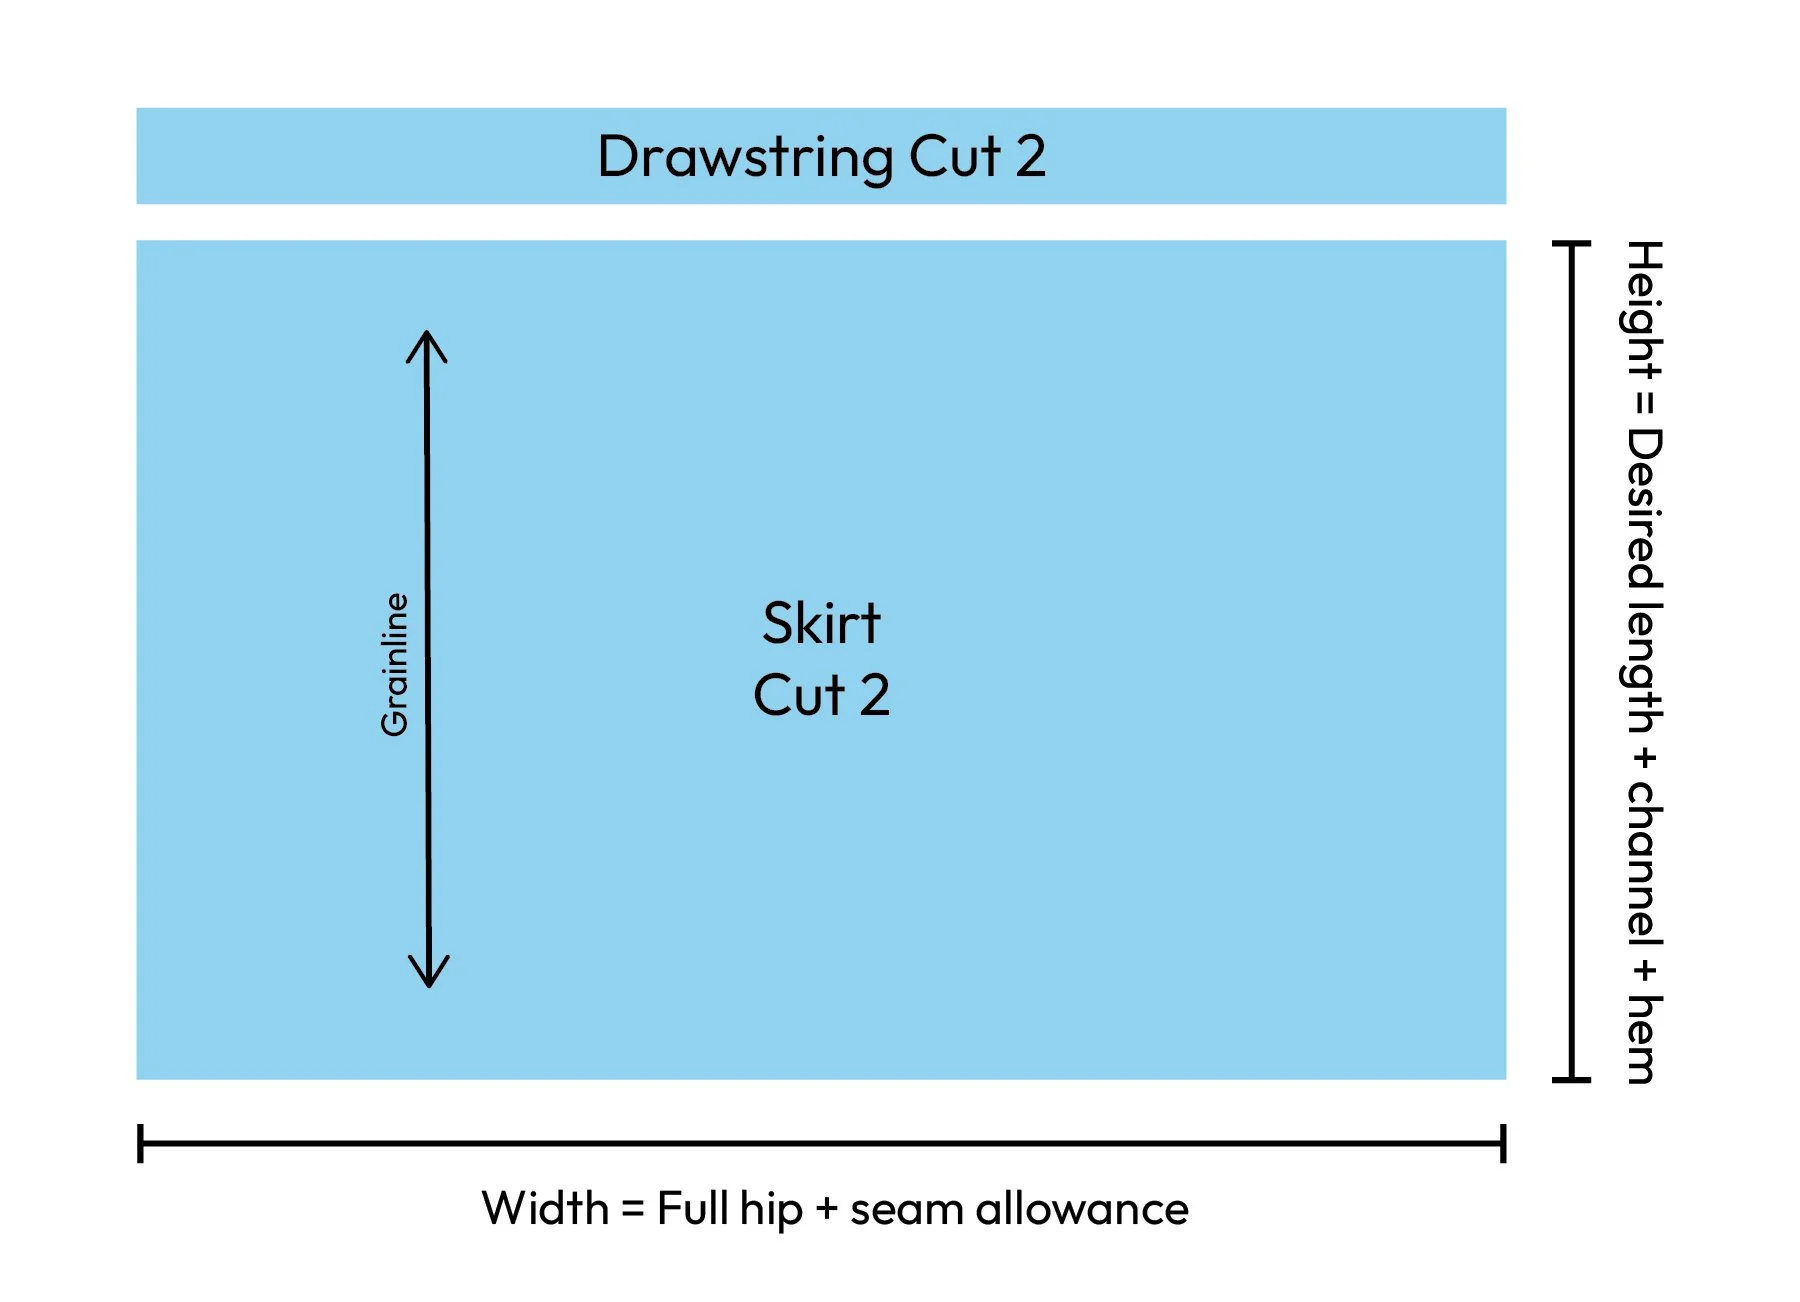
Skirt Front & Back Rectangles (cut 2)
Width: Your full hip measurement + 2cm (seam allowance)
Height: Your desired length + 6cm (for the bottom hem) + 7cm (for the drawstring channel)
Drawstring (cut 2)
Width: Your full hip
Height: 8cm
Fabric Required
Once you’ve taken your measurements, draw a scaled-down version of your fabric on paper to plan your layout. If you haven’t purchased your fabric yet, choose a standard width like 110cm or 135cm. For example, if your fabric is 140cm wide and 2 metres long, draw a rectangle that’s 14cm wide and 20cm high.
Formula:
Rectangle width = Fabric width ÷ 10
Rectangle height = Fabric length ÷ 10
Inside this mini fabric rectangle, draw scaled-down versions of your pattern pieces (including the drawstring) to see how they’ll fit. Place your front and back skirt rectangles side by side, keeping all pieces facing the same direction. Once everything is drawn, add up the total height of your layout to estimate how much fabric you’ll need.
For reference, I’m 169cm tall and usually use about 2 metres of fabric that’s 140cm wide for this style — but I always like to buy a little extra in case my calculations are off or I make a mistake.
If your measurements are bigger than the width of your fabric, you can either join pieces together and have a cool centre front seam detail, or cut your rectangles on the cross-grain.
Fabric suggestions
I’ve been using 100% cotton poplin for my skirts and love how it holds its shape while still feeling light and flowy. You could also use linen, shirting or even a lightweight wool, anything with a bit of structure works beautifully.
How to Sew It
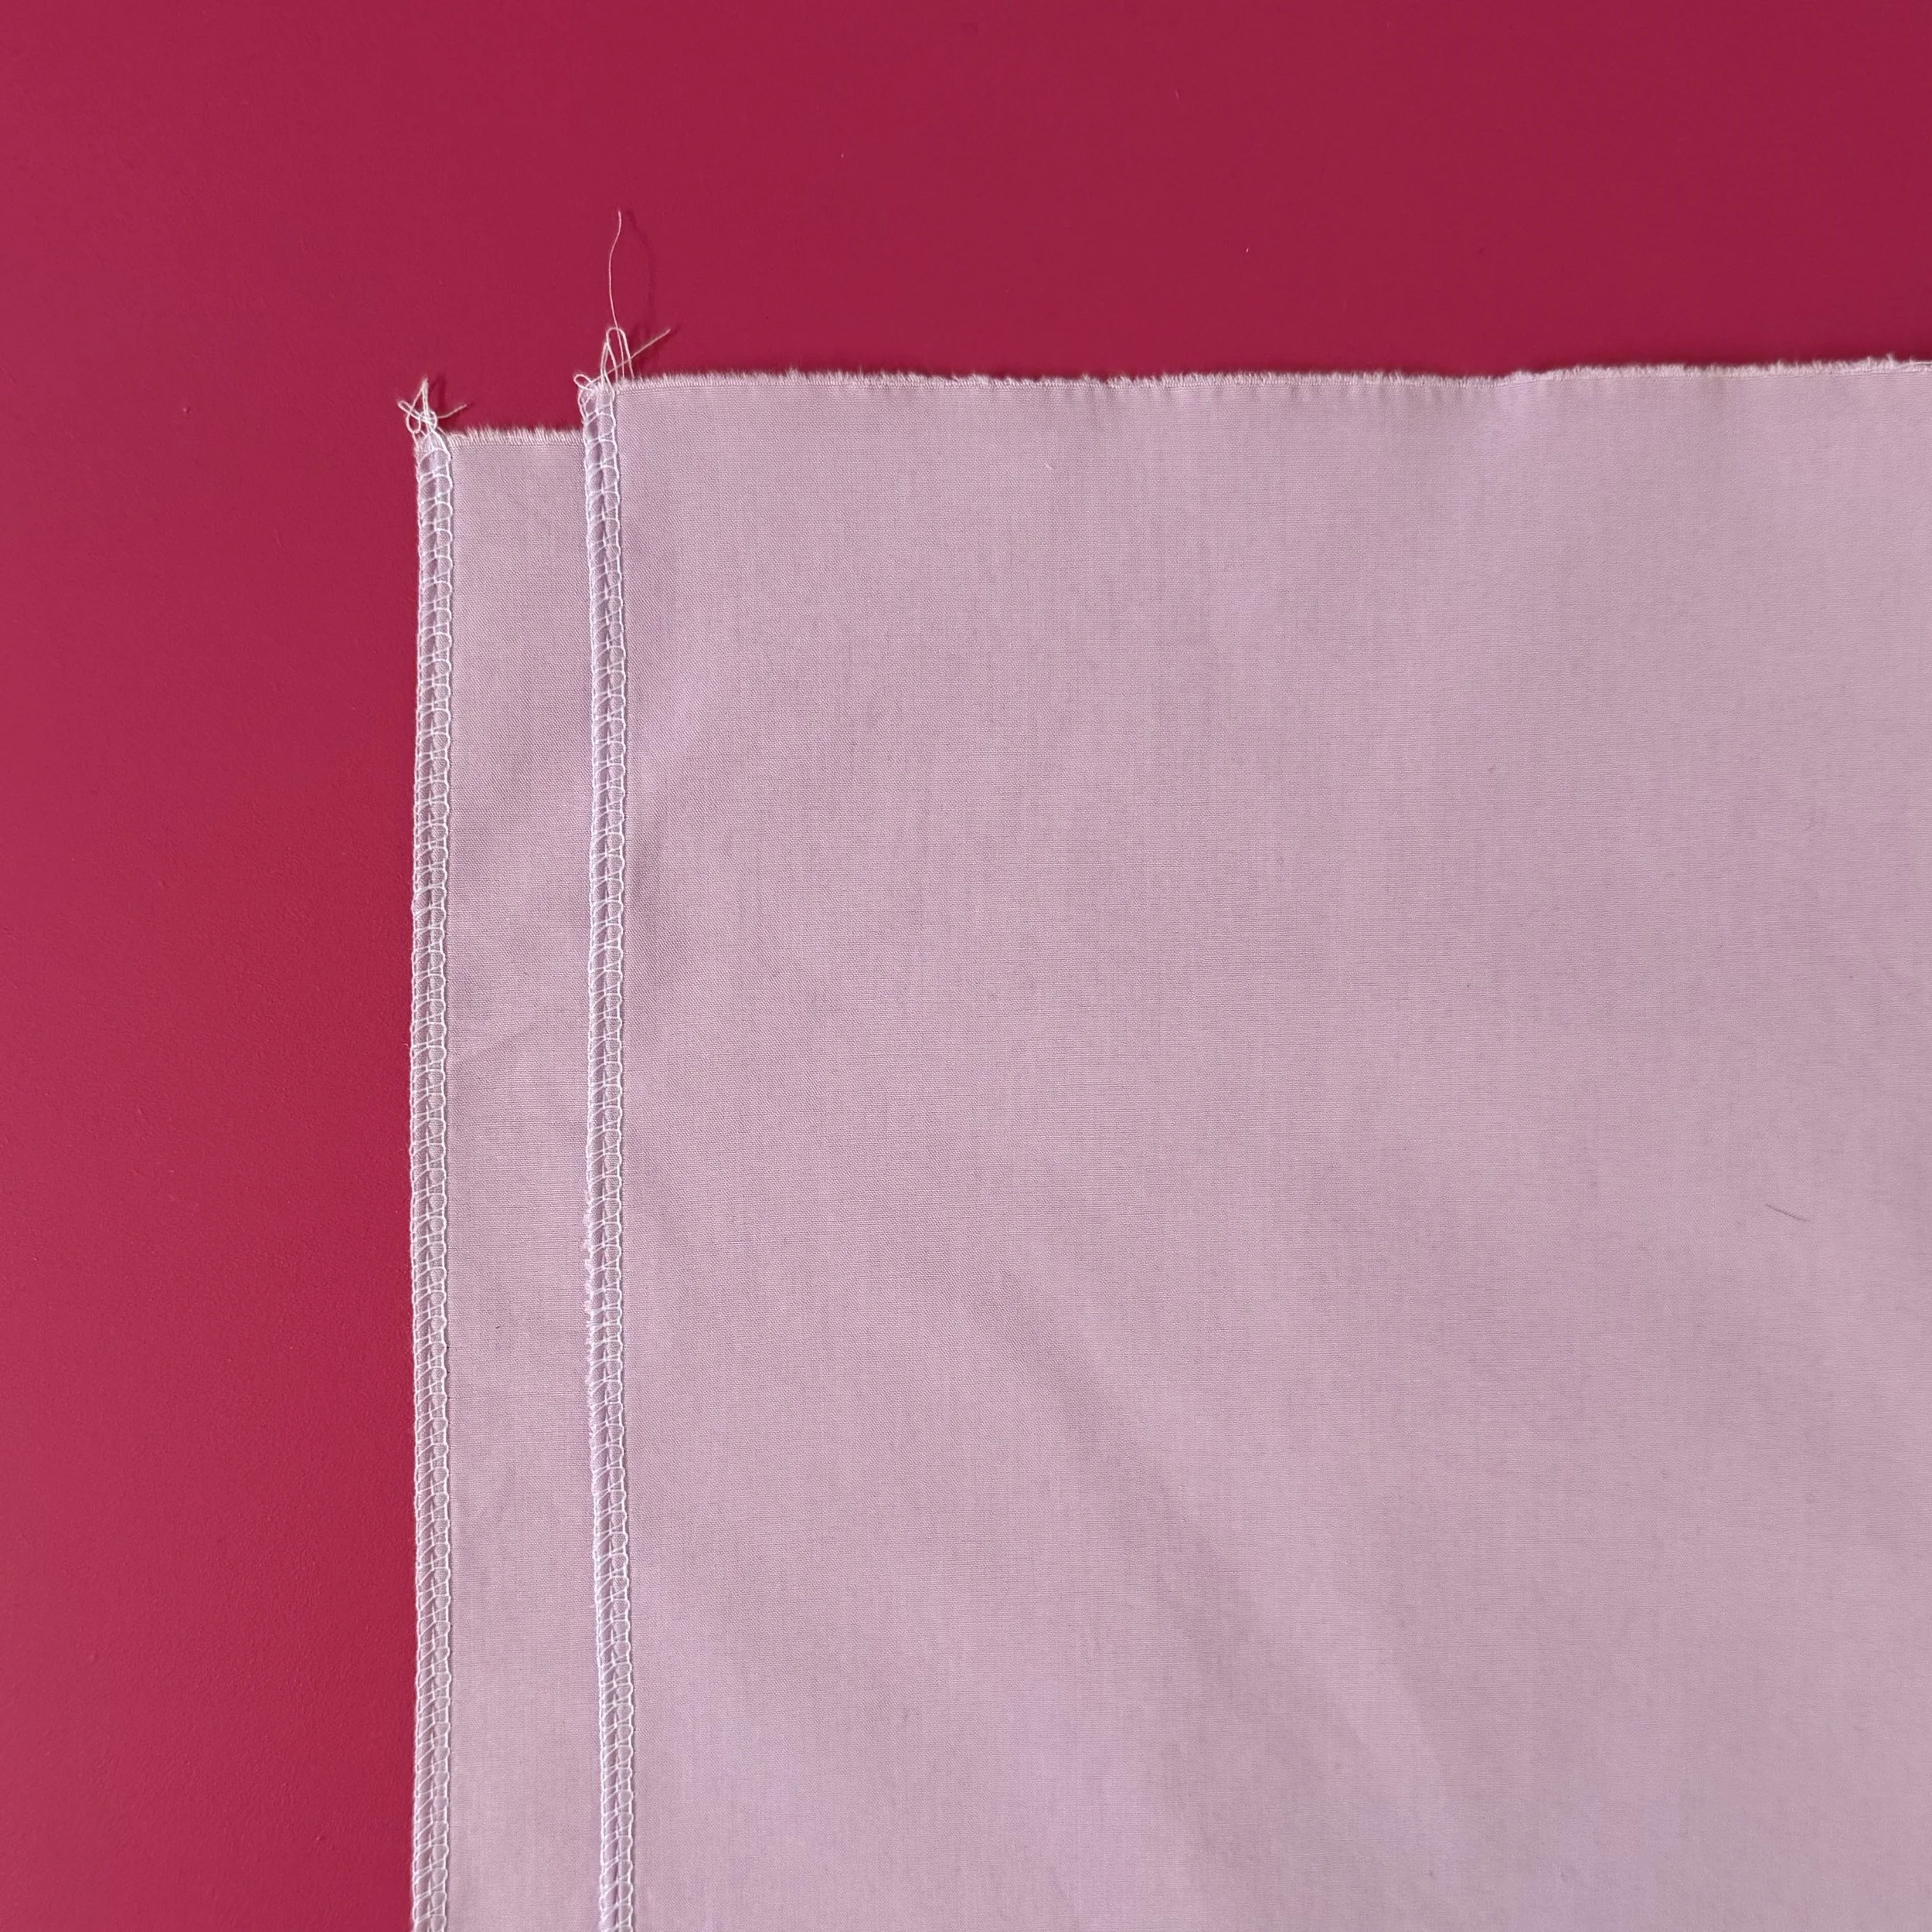
1. Finish the raw edges: Before sewing the side seams, finish the raw edges of your skirt rectangles with an overlocker on the right side of the fabric. This means the right side of the overlocker stitch is on the right side of the fabric. You can also use a zigzag stitch or bias binding if you don’t have an overlocker.
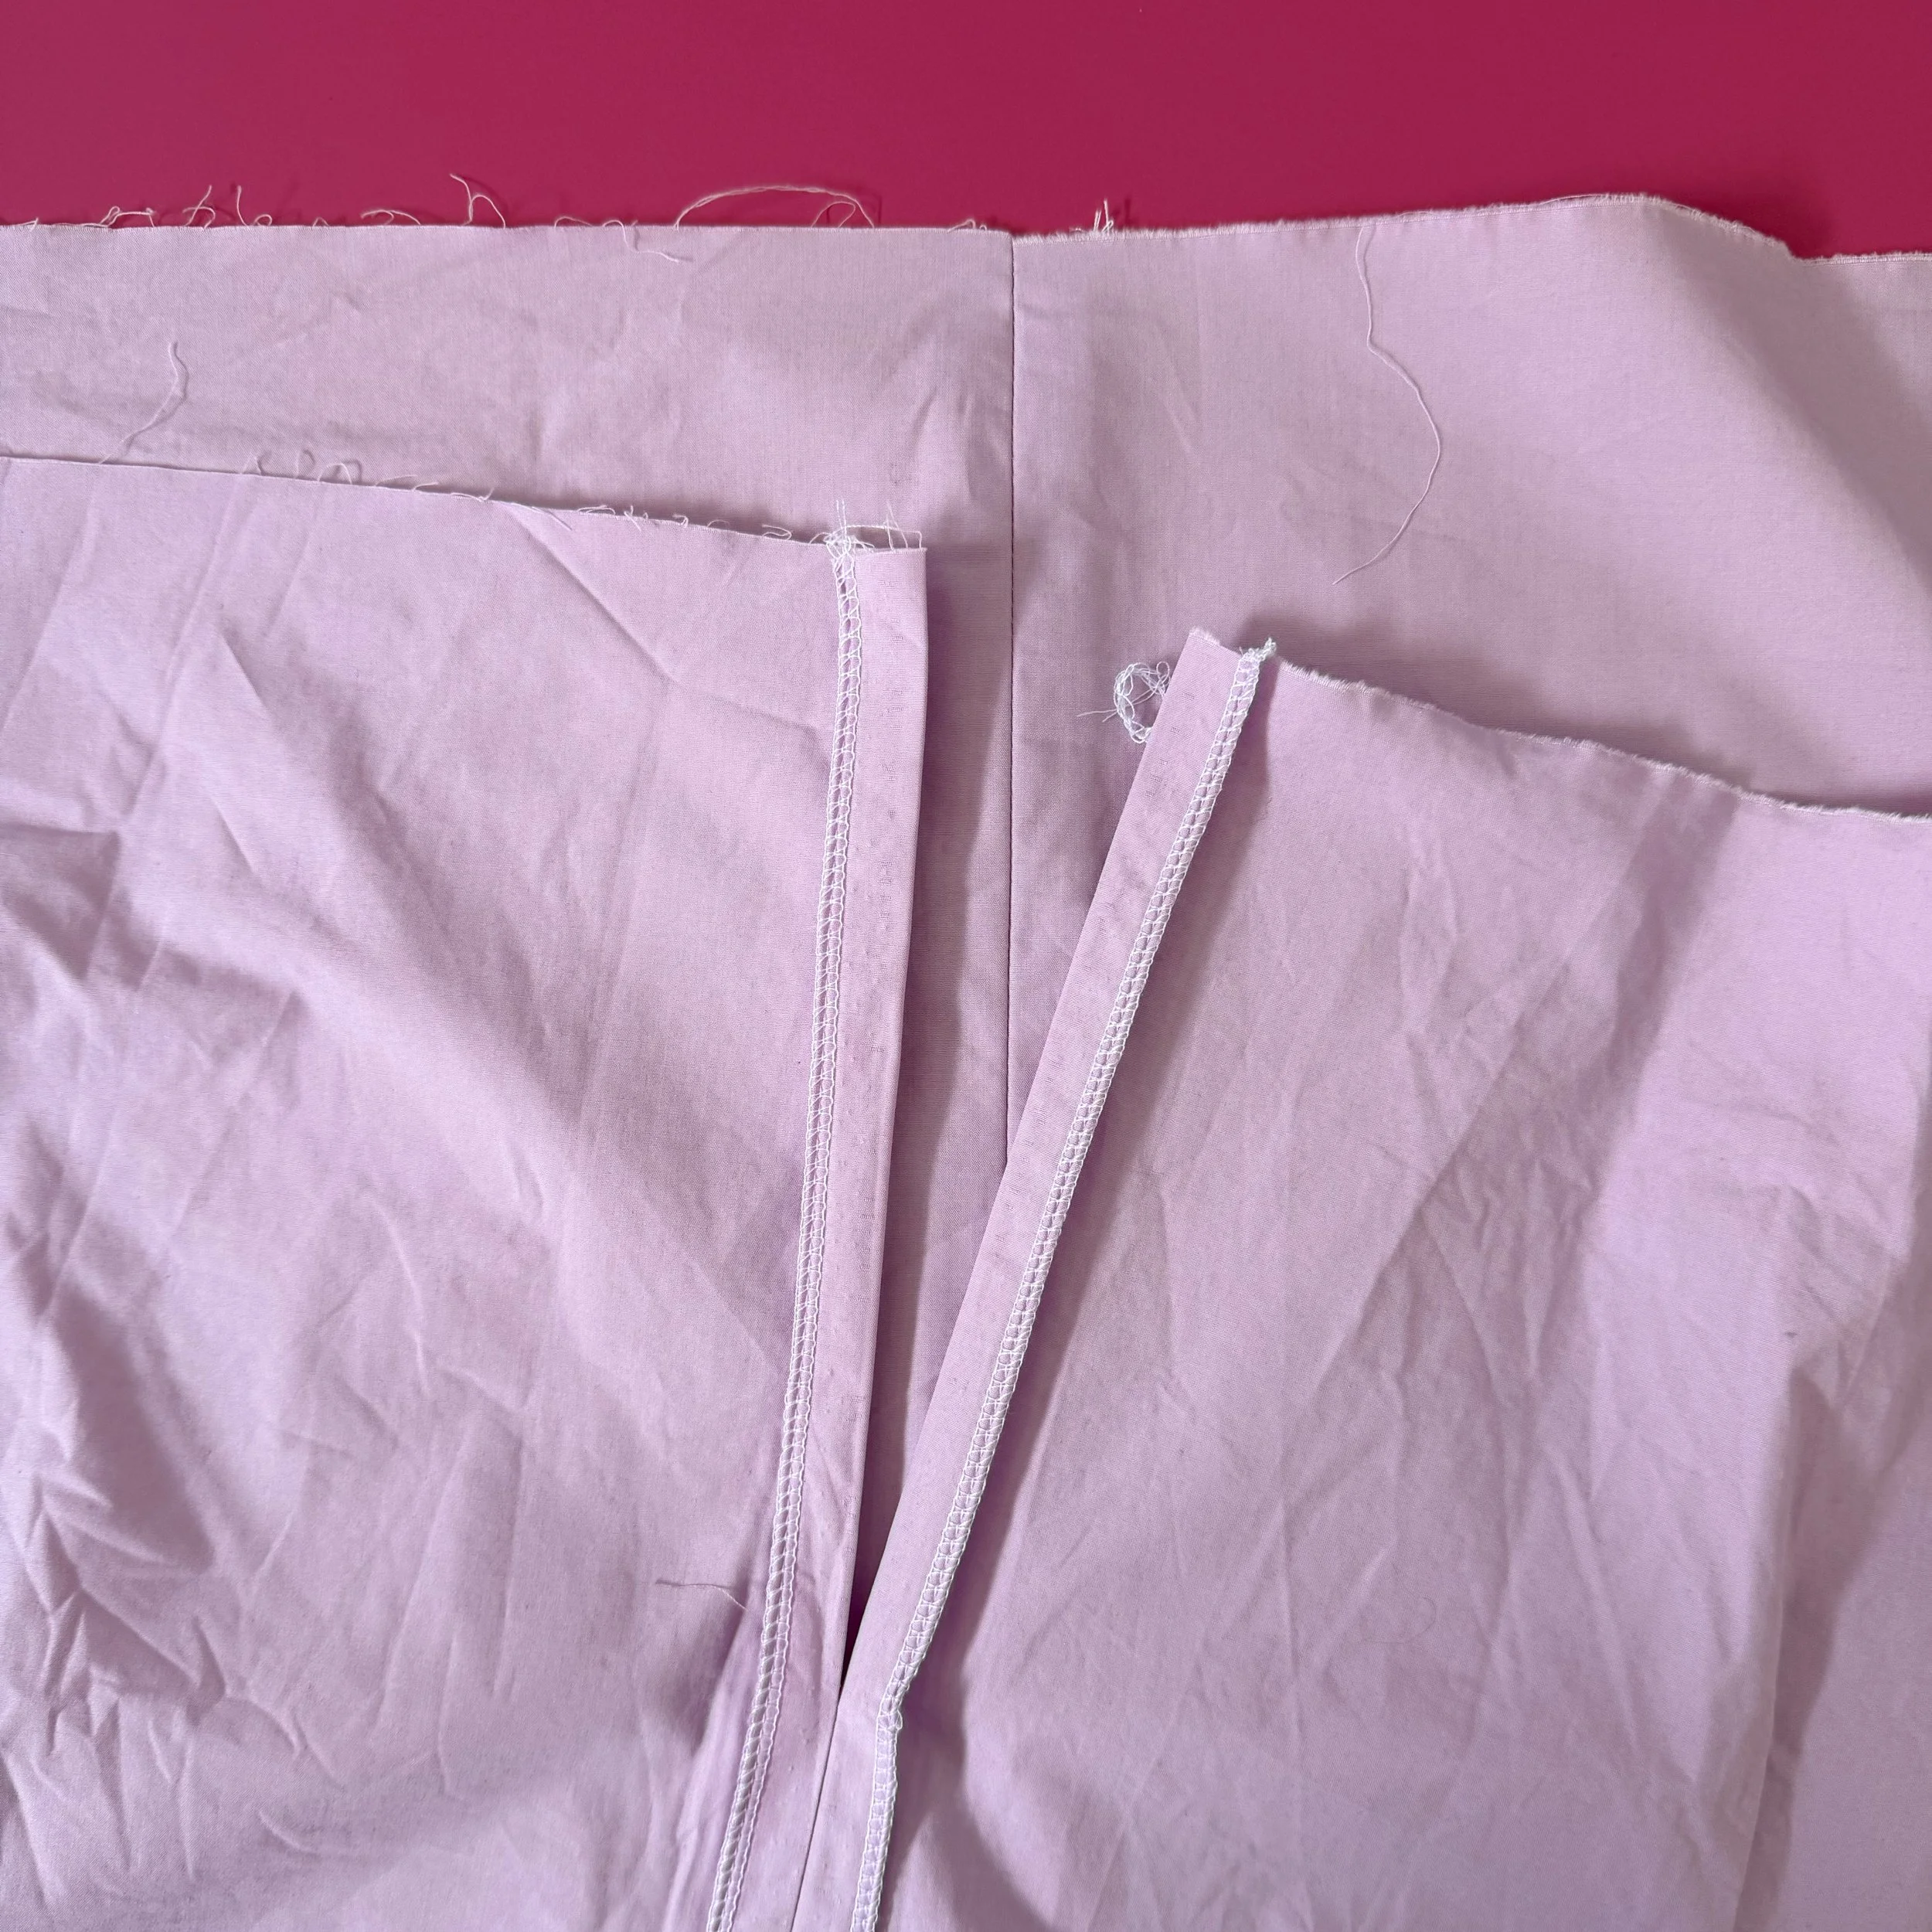
2. Sew the side seams: Place your front and back rectangles right sides together and sew both side seams with a 1cm seam allowance. On one side only, stop about 13cm from the top edge. This will become your drawstring opening. Press both seams open. You can make the opening smaller if you prefer, but this is how I’ve been doing mine. I also sew a quick tack at the bottom to keep it sturdy.
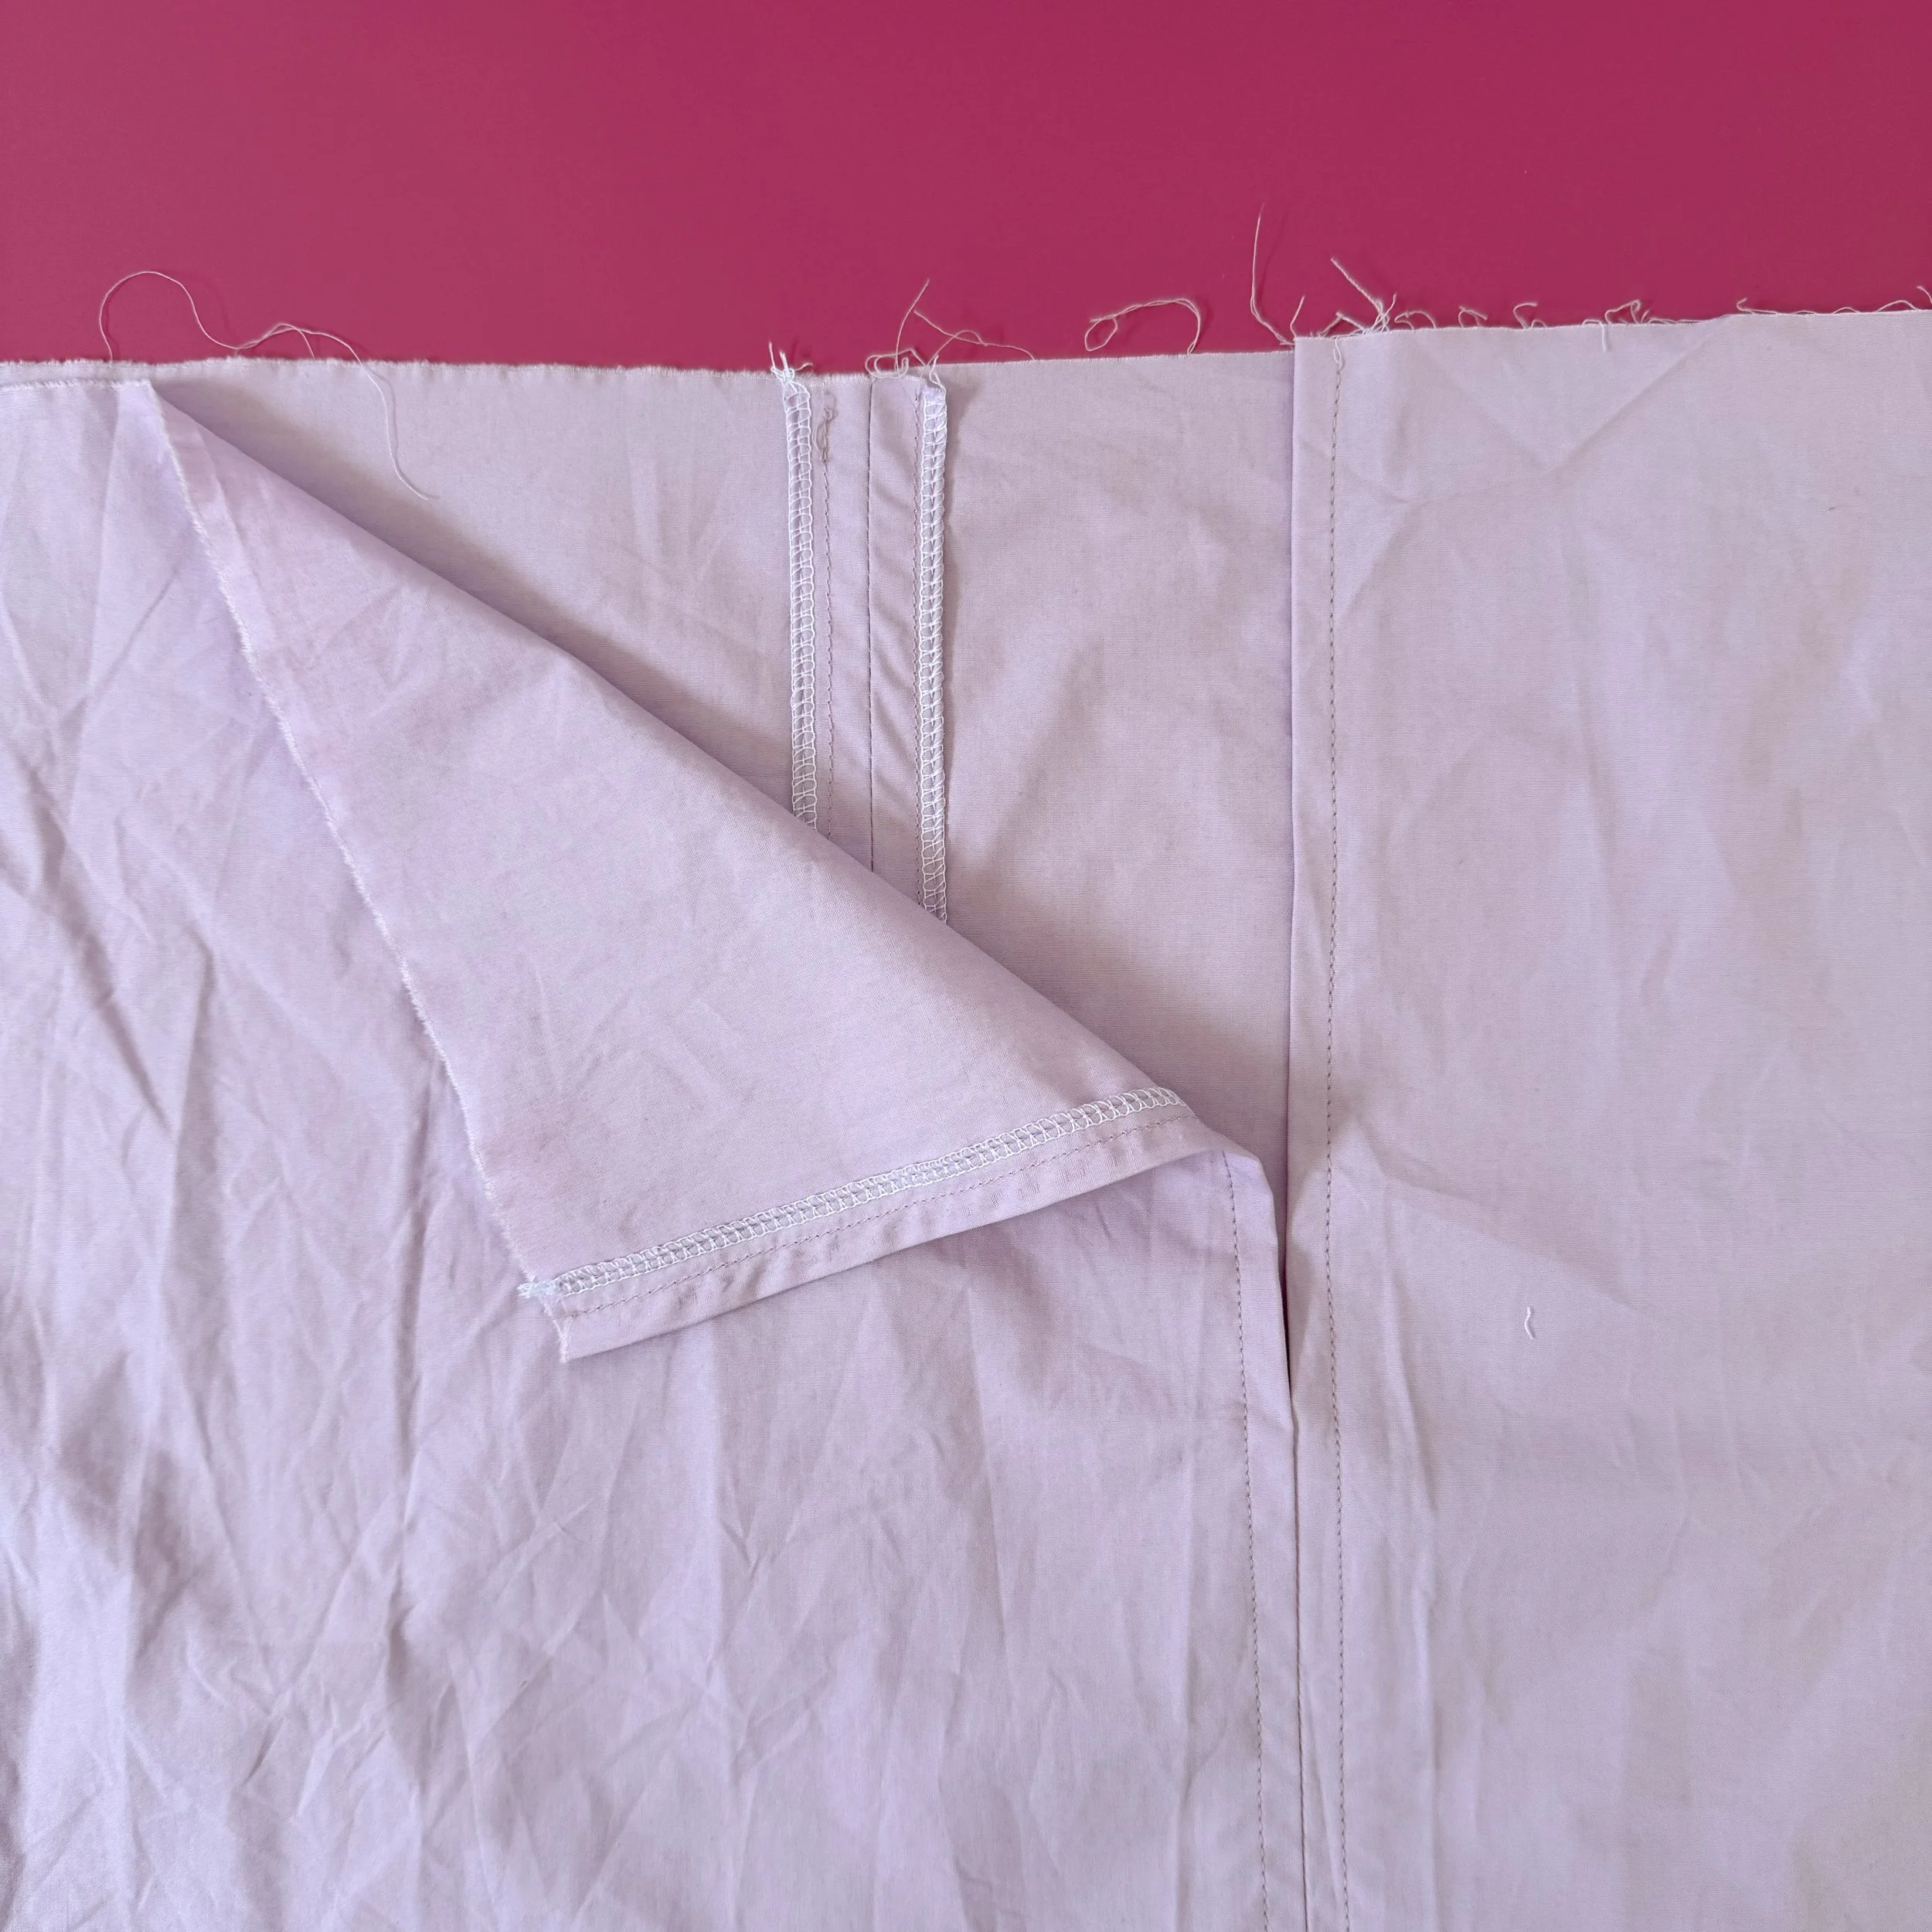
3. Topstitch for a neat finish: Topstitch down both side seams, about 5mm from the seam edge on each side, to secure the open seams and create a clean finishing detail.
4. Press and sew the drawstring channel: Fold the top edge of the skirt over by 1cm and press. Fold over again by 3cm and press once more to form the drawstring channel. Stitch close to the lower folded edge all the way around, leaving your side opening unstitched so you can insert the drawstring later.
6. Hem the bottom: Fold the hem up by 1cm, press, then fold again by 5cm (or however deep you like your hem) and stitch in place.


7. Make the drawstring: Fold the strip in half lengthways and press to find the centre crease. Open it out and fold each long edge in to meet the centre, then fold in half again and press. To finish the ends, open out the folds, place the short ends right sides together and sew. Trim the excess, turn it right side out, fold the raw edges back in, and stitch along the open edge to close and secure your drawstring.
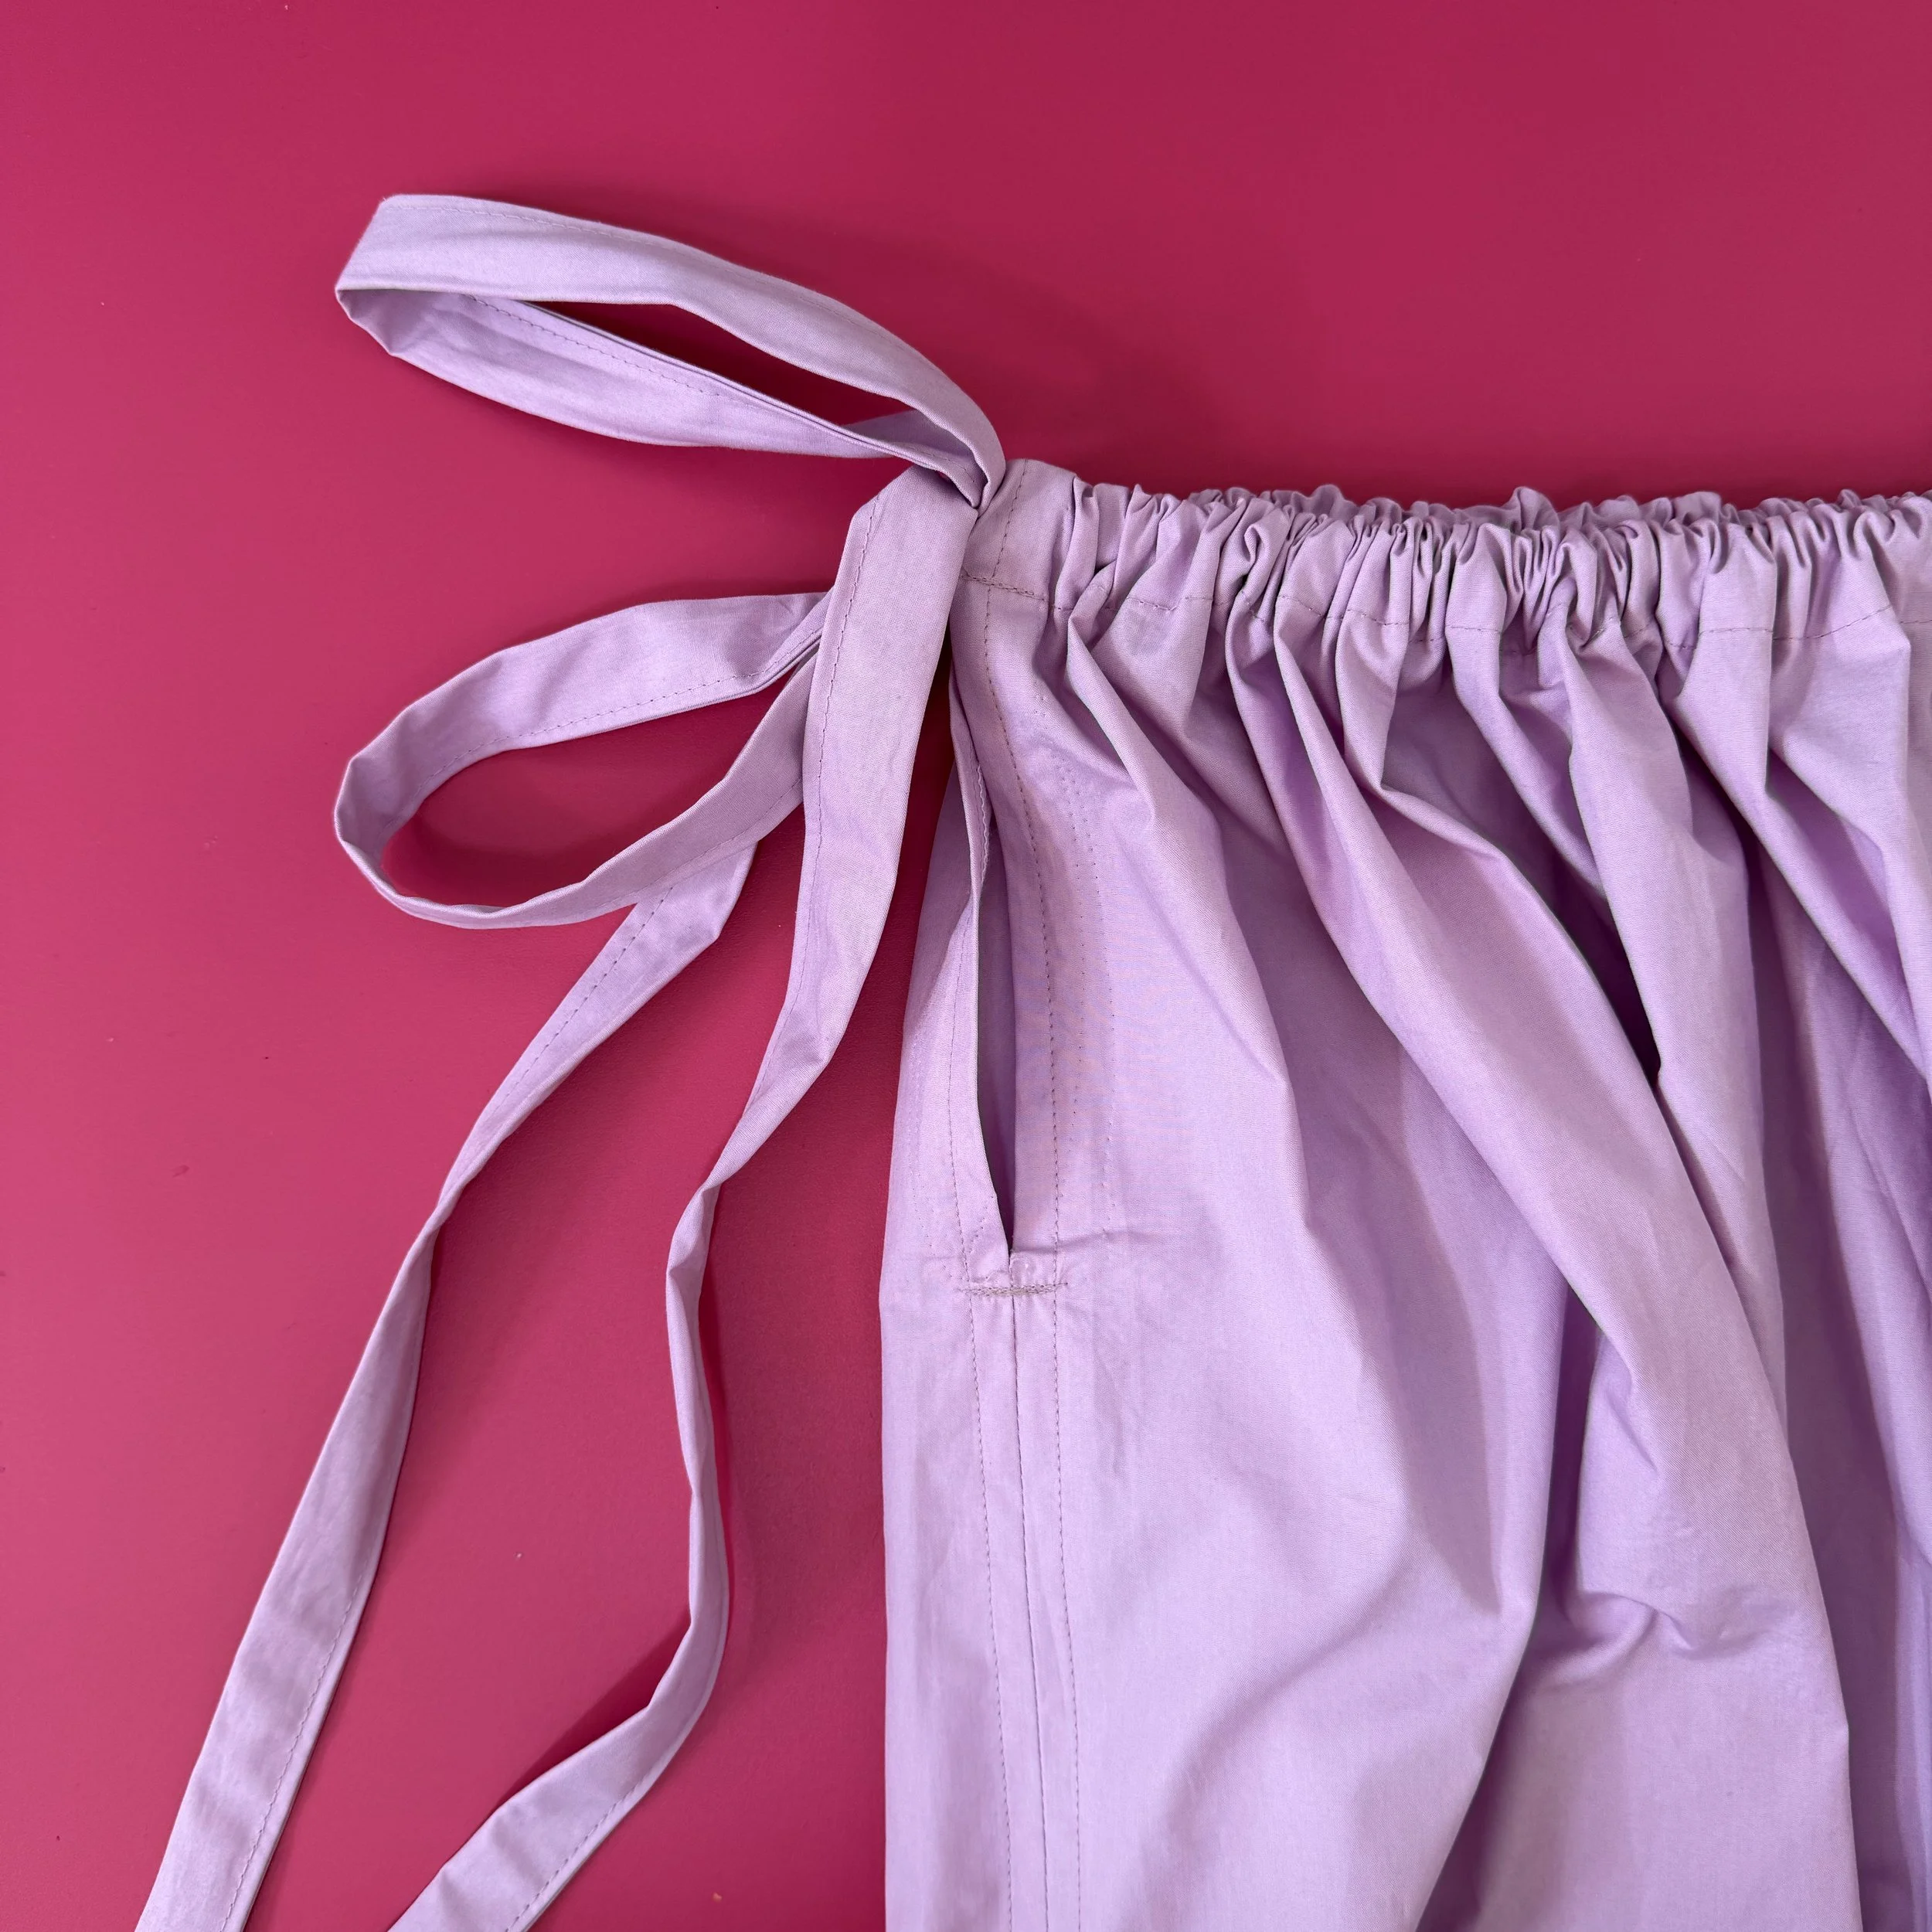
8. Thread the drawstring: Attach a safety pin to one end of the drawstring and feed it through the channel.
9. Try it on: Tie it up, adjust and spread the gathers evenly and swish around in your new creation!
If you try this tutorial, I’d love to see what you create! Tag me @_diydaisy and use #diydrawstringskirt :-)